Posts in Appetiser
The World's Best Guacamole

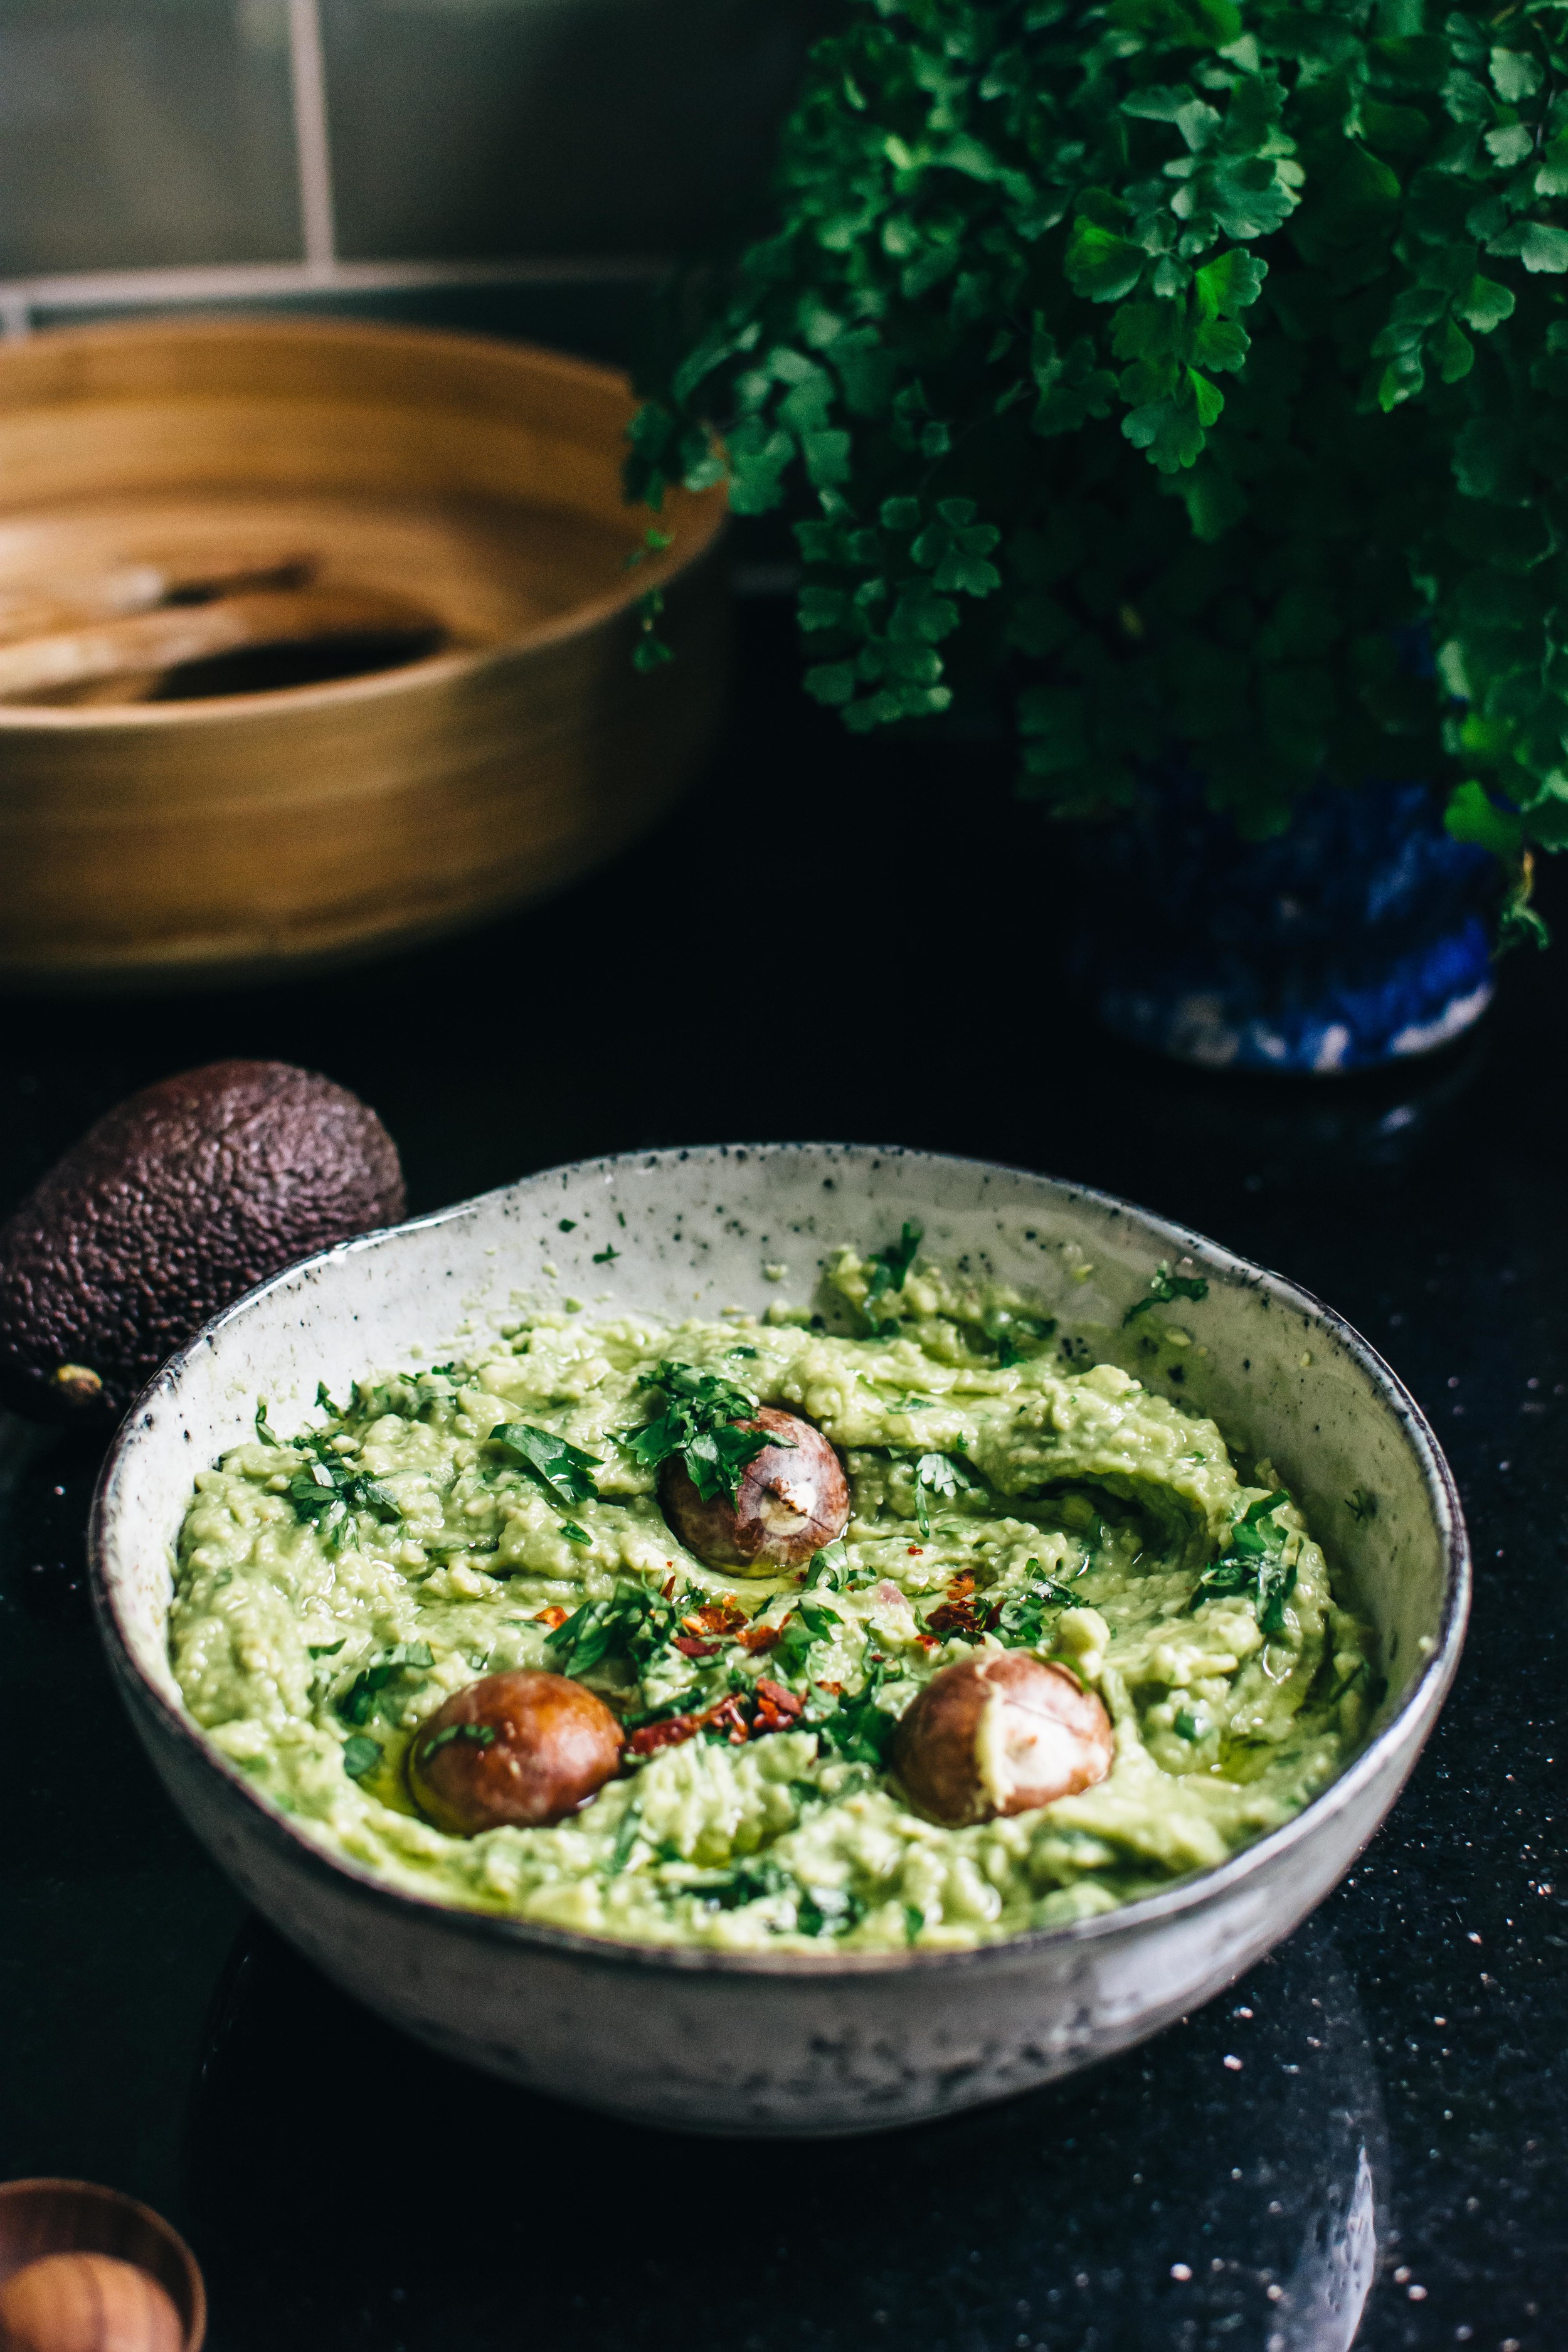
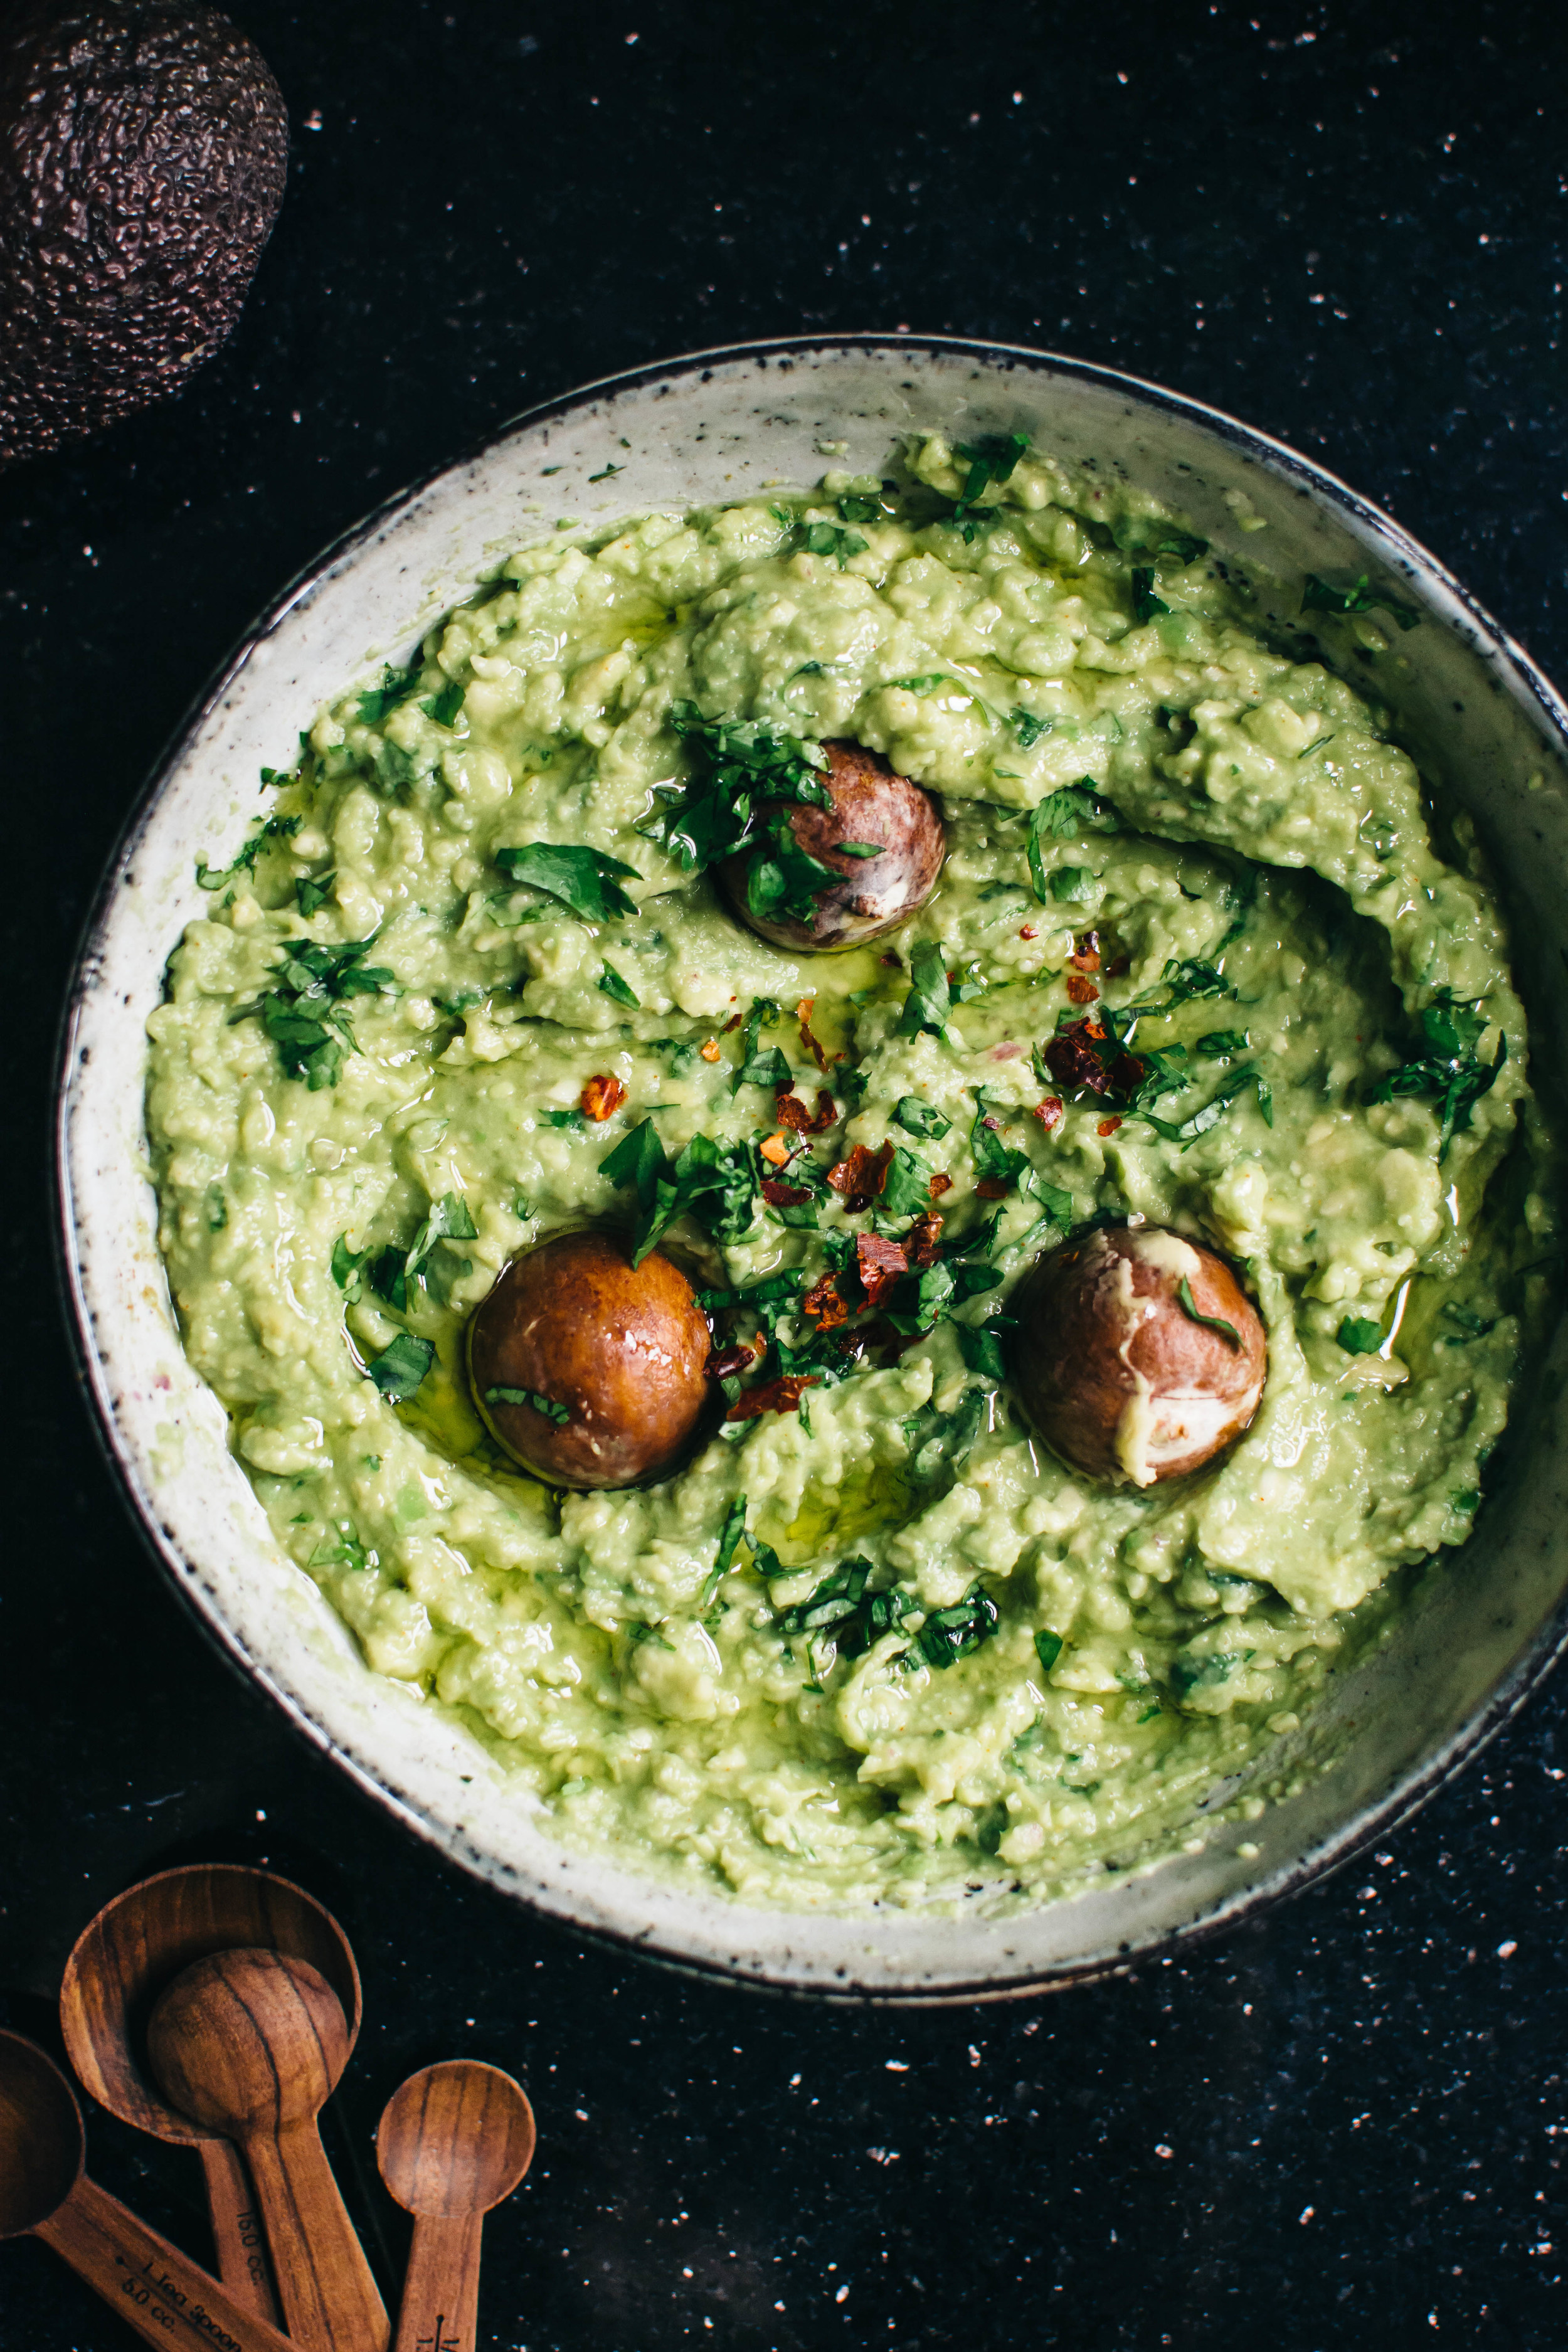
Modesty is a virtue, but this really is the best guacamole ever so any modesty I may usually have has gone straight out the window.

The World's Best Guacamole | Thyme & Honey

I know this isn’t necessarily authentic guacamole for lack of tomatoes and red onion, and the garlic in this will surely make traditionalists sneer, but if there’s any true test to its greatness it will be that the raw onion and fresh coriander go totally undetected by my many onion hating, coriander bashing friends. 

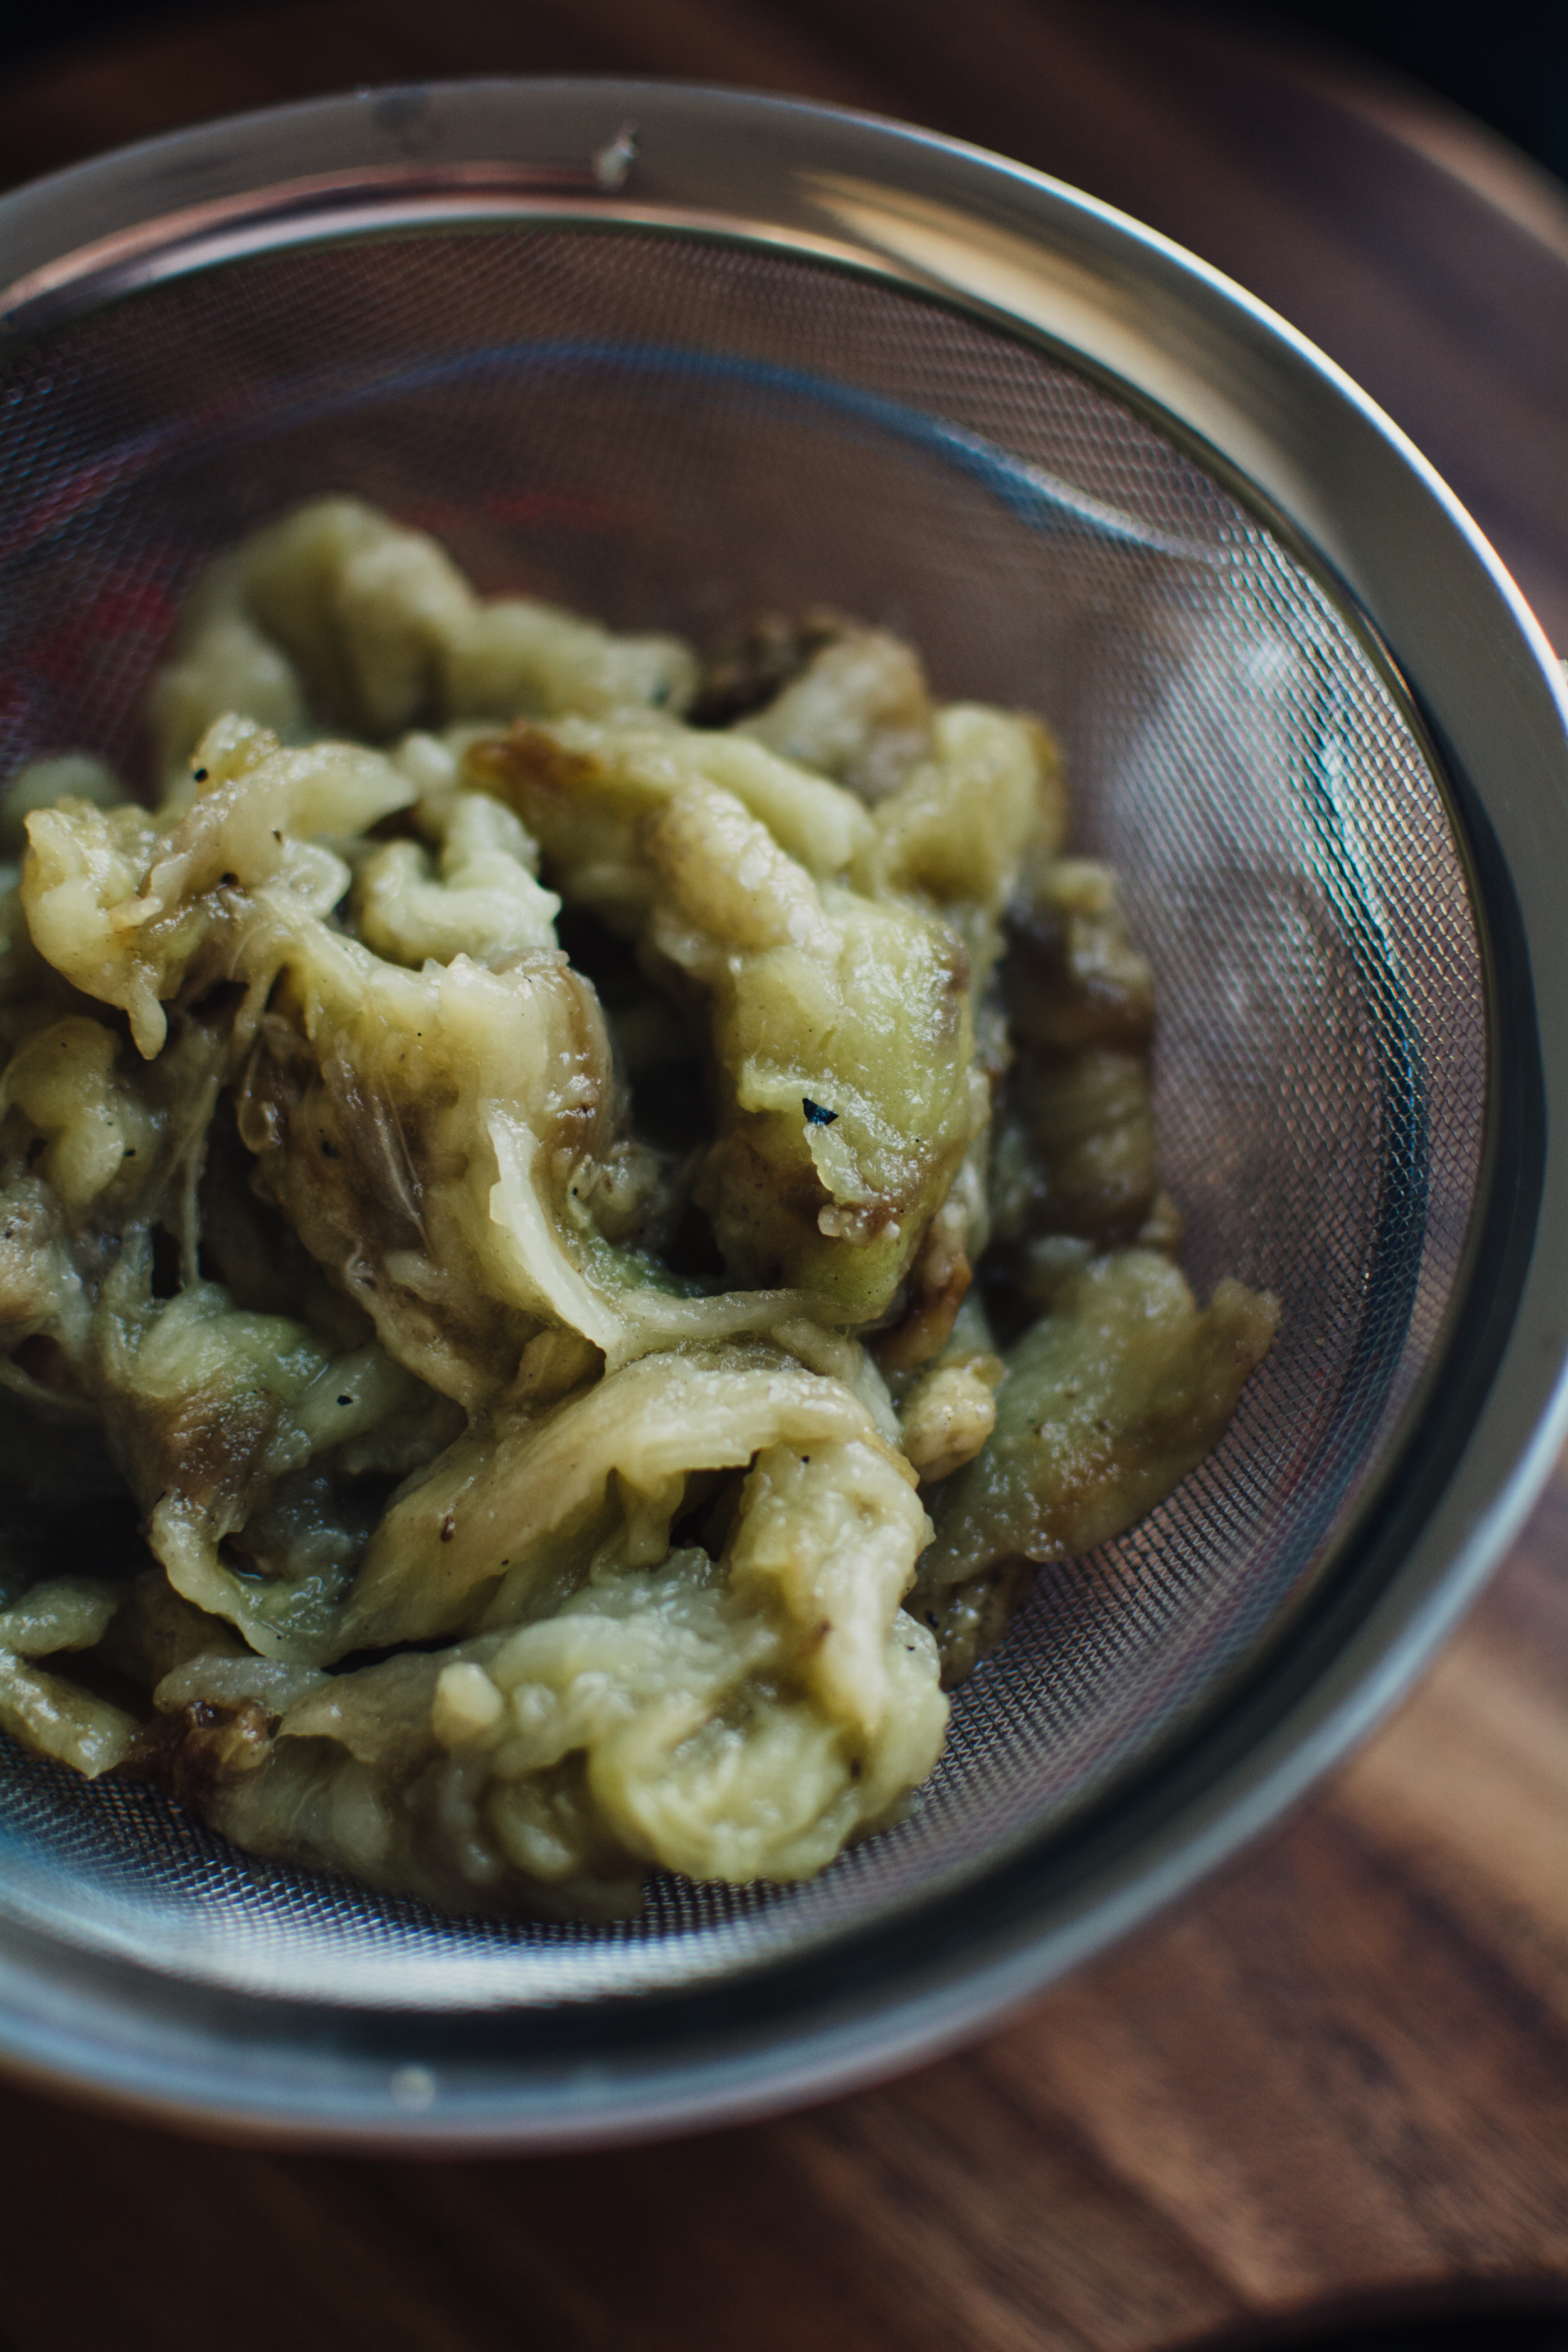
Grating the onion and garlic right into the avocado means this can be whipped up in a matter of minutes, which is handy when it will inevitably be devoured at the same rate. Just make sure your avocados are ripe (essential) and that you have plenty of tortilla chips, because guacamole without tortilla chips is a very sad dip indeed.

Given that the lime and raw onion possess magical abilities to prevent the avocado from oxidising, adding the stones is less of an extra careful precaution and more of a doesn't this look kind of pretty? decision. I like to serve mine with a sprinkle of hot chilli flakes, chopped coriander and a glug of the best quality olive oil I've got. 


Guacamole

Makes one big ass bowl

Adapted from Heidi Swanson’s Guacamole recipe

Ingredients

4 ripe, medium sized avocados

1/4 white onion, finely grated

1 garlic clove, minced

Tabasco hot sauce

Juice of 1 lime

1/4 teaspoon salt

Fresh coriander, finely chopped

Hot chilli flakes and good quality olive oil to serve


Method

  1. On a chopping board, mash the avocado with a fork and then transfer it to a large bowl. 
  2. Directly grate in the onion and garlic clove and mix well. 
  3. Add around 10 dashes of Tabasco and the juice of a lime.
  4. Add 1/4 teaspoon of salt and taste - add as needed. 
  5. Finally stir in around 2 tablespoons of chopped coriander.
  6. Serve drizzled with olive oil and top with extra coriander and chilli flakes. And tortilla chips, obviously.
Curried Carrot + Chickpea Salad

Episodic memories are those that form feeling toward a particular time or place. Personally I find these memories awaken when the seasons begin to shift from spring to summer, and a plethora of imagery comes bounding into view, leading to a babble of memories of idyllic nostalgia; the smell of Nivea suncream, the sound of the sea lapping methodically on the shore, slithers of blinding sunlight creeping through thick pine in the Troodos mountains - you get the picture. Ultimately these lucid dreams of summer result in me spending hours Google searching 'best beach holidays in Europe 20-whatever it is' and vowing to steer clear of ice cream in preparation for the big reveal come beach day. 

Curried Carrot + Chickpea Salad | Thyme & Honey

And so is life, 6 weeks prior to my departure for 10 days of unadulterated bliss, sea, sun, mountains, food and family I begin this torturous countdown that involves many a salad, and not so many an ice cream. My better self tells me it will be worth it, my lazy, sugar-loving self hisses at the former with pure hatred. 

I proceed with varying levels of sadness, denial and hesitation, but occasionally I find moments of victory is salads like this. Largely raw, eye pleasingly colourful and packed with protein, fiber, zinc, vitamins A & C, antioxidants and more wonderfully restorative and essential nutrients, this was quickly added to my arsenal of 'eat clean' recipes.

Using Madras curry powder in the dressing adds a unique smoky undertone, while the lemon juice keeps it fresh and zingy. If I wasn't avoiding dairy I'd have added a dollop of plain Greek-style yoghurt, or a few crumbly bites of feta. Oh, to dream (about everything I will inhale once I'm actually on holiday). 

Curried Carrot + Chickpea Salad | Thyme & Honey

Curried Carrot + Chickpea Salad

Serves 4, or 2 as a main

Ingredients

1 large carrot

240g cooked chickpeas

10 small asparagus spears

Handful of radishes, around 5 or 6, thinly sliced

2 tablespoons capers

30ml olive oil

1 teaspoon Madras curry powder

1/4 teaspoon ground cinnamon

Juice of half a lemon

Mixed salad greens - I used a mix of fennel tops and sweet leaves


Method

  1. Using a julienne peeler, slice the carrot into thin strips. If you don't have one of those peelers you can use a mandoline to slice the carrot into ribbons, and then cut the strips by hand. You can also use the mandoline to slice the radishes. 
  2. Remove the spears from the asparagus stalks and set aside. Use a vegetable peeler to create shavings from the stalks. 
  3. Place the chickpeas, carrots, asparagus shavings and radishes in a bowl and set aside whilst you make the dressing. 
  4. Combine the olive oil, curry powder, cinnamon, lemon juice and a good amount of seasoning, whisking well to combine. Pour the dressing over the vegetables and toss well until evenly distributed. 
  5. Blanche the asparagus tips in boiling water - submerge them for a couple of minutes before rinsing under cold water.
  6. Serve the dressed salad on a bed of leafy greens and scatter over the capers and asparagus tips before adding a final drizzle of olive oil. 


Mexican Street Corn [Elotes]

Where do I start with this one? There are so many great things about this grilled, creamy, spicy Mexican street food staple that attempting to put it all into words is no easy feat. 

Mexican Street Corn | Thyme & Honey

I mean, just look at them. Yellow as the sun with a cheeky bit of char, lathered in a completely unnecessary yet more than welcome chilli mayo dressing, topped with crumbled super creamy queso fresco (or feta works just as well), finished with a few zesty sprinkles of lime, a blessing of chopped coriander and a dusting of chilli powder for that all important kick. I'll let you digest all of that for a sec. It's kind of magical, right? 

A bite out of one of these beauties and you'll wonder why you have ever bothered eating corn another way. Seriously, what is the actual point of grilled corn on the cob with a bit of butter when you can eat them like this? That Clover advert depicting a grown man crying over a bit of butter rubbed half-arsed onto boiled corn has been selling lies to this nation for far too long. I am hoping that this recipe will put a stop to crap corn. 

So here I am, shouting it from the goddam rooftops of South West London! Banish the butter! Say no to bland, boiled corn! And get loco with your otherwise completely mediocre yellow knobbled large grain plant (apparently not actually a vegetable...?). 

PS. it just so happens to be Cinco de Mayo on, funnily enough, the 5th of May. If you know a better way to celebrate Mexican Independence, a historic event that most likely has nothing to do with you, than with these elotes then I challenge you to Mexican fiesta dual, your dish vs. mine. Sombreros, compulsory.


Mexican Street Corn

Serves 4

Ingredients

4 sweetcorn cobs, husked

65g mayonnaise

1 teaspoon Sriracha sauce

Zest and juice of half a lime

30g queso fresco, or feta

Chilli powder

Bunch of coriander, roughly chopped


Method

  1. Wrap each corn cob in aluminium foil and bake in the oven for 35 minutes at 200°c
  2. Meanwhile mix together the mayo and Sriracha and set aside.
  3. Once the corn cobs are done, finish them off by removing from the foil and putting under the grill for 5-10 minutes in order to char slightly. You can also do this on the BBQ. Keep an eye on them so they don’t burn, and remove them from the oven/BBQ once you’re happy.
  4. To serve, brush the corn with the mayo mixture then top with some lime zest and juice.
  5. Crumble over the queso fresco and shake a bit of chilli powder on top.
  6. Garnish with the chopped coriander, serve and devour.
Baba Ghanouj

Baba ghanouj, with its distinct smoky flavour and creamy texture, is up there with the best of Middle Eastern food in my book. Along with  hummus it holds a certain nostalgia for me, forever being on the table alongside fresh saj and soujouk when we'd sit down to eat with family in Cyprus. We'd usually keep a tub of it on hand back at home in London, but up until recently I hadn't really tried making it myself. 

Baba Ghanouj | Thyme & Honey

This was in part due to the fact I didn't have a gas range at home, and also because the purist in me remains stubborn on charring the aubergines instead of the simpler (and cleaner) process of baking them, but once I moved into my flat last year, equipped with a gas range cooker, I couldn't resist trying it out.  

There is a fair amount of debate concerning what makes the 'perfect' baba ghanouj, and writer Felicity Cloake tackles this quite well in her column for The Guardian. Like Felicity, I like researching and testing different takes on a recipe to get the perfect version, and among other resources I used her article as an aid in my quest for the ultimate creamy, smoky and garlicky dip. 

Personally I like enough lemon to taste but not enough to make the flavour obviously citrusy, a hint of garlic (1 clove per every two aubergines), and the essential ingredient, tahini - although just a little otherwise you'll end up with something more akin to hummus. The below recipe is what I consider to be the perfect baba ghanouj, and now that I've found the right balance the only thing likely to change when I make it is whether I garnish it with chopped mint or not. 

Don't let the process of charring it put you off, likewise if you don't have a gas hob don't let that deter you either as you can still make delicious baba ghanouj without this process. What I find is most important is creating the right balance of flavours according to your own personal taste - although I think you might quite like the recipe below nevertheless. 

Baba Ghanouj | Thyme & Honey

Baba Ghanouj

Serves 4

Ingredients

2 medium aubergines

1 garlic clove, minced

2 tablespoons tahini paste

Juice of half a lemon

Pinch of salt

Olive oil and pomegranate seeds to serve


Method

  1. Burn the aubergines using a gas cooker. Sit the aubergines on top of a low-medium flame, turning often. Cook until they are practically caving in on themselves. If you don't have a gas hob, prick and bake the aubergines whole in an oven set to 180°c (160°c FAN) for 30-40 minutes. 
  2. Leave the cooked aubergines to cool slightly before peeling away the skin. Place the flesh into a fine mesh sieve and leave to slowly drain for 20 minutes. 
  3. After draining, break the flesh up gently with a fork - I like to keep mine quite chunky but you can mash it up as much or as little as you like. 
  4. Stir in the minced garlic, tahini and salt. Add the lemon juice and taste - adjust with more tahini/lemon/salt as needed. 
  5. Serve with olive oil and pomegranate seeds. 


Fennel + Blood Orange Salad

Blood oranges – the true elites of the citrus family. Gracing us with their presence for a month or so before disappearing for another year, they are by far my favourite citrus fruit, and not just for their pretty colours. Now that they’re in season I'm buying them whenever I can and using them in just about anything. But this salad is, with its few ingredients and minimal effort, one of the best ways to enjoy them.

The natural sweet tartness from the blood orange, and the slight bitterness from the fennel results in this salad sort of dressing itself. Add a splash of olive oil and you’ll find that all the flavours come together yet manage to still stand out on their own – it is magical.

Fennel + Blood Orange Salad | Thyme & Honey

Fennel + Blood Orange Salad

Serves 2

Ingredients

1 fennel bulb

2 blood oranges

Seeds from half a pomegranate

2 inches of fresh chives

Olive oil


Method

  1. Using a mandolin, slice the fennel into a bowl. 
  2. Remove the peel from the blood oranges and then cut into slices.
  3. Arrange both the fennel and blood orange discs on a plate, drizzle over olive oil, add a sprinkle of pom seeds and your chopped chives. Simple!
Vegan Fennel, Radish + Broccoli Slaw

It started out of sheer laziness, adding raw vegetables to salads instead of bothering to cook them. With a single swipe along my mandolin I had slithers of cauliflower, fennel or broccoli that would have otherwise been cooked first had this new option not been so convenient. With the right kind of dressing I found that I could make a sort of vegetable ceviche, the edge taken off that typically unappetising ‘rawness’, the flavour mellowing through marinating in my lunch box on my desk at work.

I’ve been testing various slaw recipes periodically, sometimes opting for an Asian combination of flavours, other times a luxuriously creamy American style, but this really is the recipe that I keep coming back to. The dressing here unlike in other slaw recipes is certainly not the show-stealer, but its subtle nutty flavour thanks to tahini is a welcome note on the palate. Throw this together quickly and leave for a while for the flavours to really gel. I eat this for lunch on its own, or with half an avocado for good measure. Adding a slice of rye bread into the equation is always a welcome addition, too.

If you’ve been reading my posts for a while you would have heard me discuss a new found love of plant-based eating, and although I cannot confirm that I have been exercising this new diet religiously and without steak/eggs, I can confirm that for the most part I am still enjoying creating dairy-free/meat-free dishes – on occasion. This slaw just so happens to work extremely well with either a dairy alternative to yoghurt, or the real deal. So, do with it what you will.


VEGAN FENNEL, RADISH + BROCCOLI SLAW

Serves 4

Ingredients

1 medium head of broccoli

1 large fennel

6-8 radishes

100g cavolo nero, stalks removed and leaves shredded

8 stalks of fresh dill

For the dressing:

60ml olive oil

30ml tahini paste

50ml soya, coconut or regular yoghurt

2tsp rice mirin or vinegar

Juice of 1 lemon


Method

  1. Using a mandolin if you have one will make putting this salad together a total breeze. If you don’t have one, then try and slice the fennel and radishes as finely as possible.
  2. Slice the fennel, radishes and broccoli using a mandolin and place in a large bowl. Add the shredded cavolo nero and tear in the fresh dill leaves.
  3. For the dressing add all of the ingredients to a jam jar and shake well until thoroughly mixed and creamy in consistency.
  4. Pour the dressing over the salad, toss well to coat. Season to taste with salt flakes and freshly ground black pepper.
  5. Serve on its own or in rye (or however you like) with extra fresh dill and a drizzle of extra olive oil.
Ginger Miso Tahini Soup

Hello!

It has been some time, hasn’t it? But now I’m back and I can finally wish you a Happy New Year! I hope the first two weeks of 2015 have been wonderful to you.

Ginger Miso Tahini Soup | Thyme & Honey

I don’t usually set myself resolutions for the new year, but last year I inadvertently gave up smoking, and I can happily say it’s been a total blast breathing much more easily over the last 379 days. This year however, I made a conscious decision to add a few life goals to my list this year:

  • I will eat well, consistently and be as eco-friendly as possible
  • I will listen more and talk about myself less
  • I will appreciate what I have right now instead of yearning for what I could have

and;

  • I will make this miso-tahini soup once a week for the rest of my life AMEN

Ginger Miso Tahini Soup

Serves 4

Ingredients

500g medium squash, either butternut or coquina, cut into smallish pieces

1 tablespoon toasted sesame oil

Juice of half a navel orange

3 tablespoons miso paste

50g tahini

1 inch of ginger, peeled and minced

300-400g cooked brown rice

2 ripe avocados

Black sesame seeds


Method

  1. Arrange the squash pieces on a baking tray and drizzle with 1 tablespoon toasted sesame oil and the juice of half an orange. Roast in the centre of the oven at 220°c (200°c Fan) for 45 minutes.
  2. Add the miso paste to a bowl and add a couple of tablespoons of boiled water to loosen. In a large saucepan add the tahini, minced ginger and 500ml water and bring to the boil. Add the miso paste and reduce to a simmer for 5 minutes. Season to taste.
  3. To serve, distribute the brown rice evenly into four bowls and top with roasted squash. Pour over the miso-tahini broth, top with half a sliced avocado and sprinkle with black sesame seeds.
Quinoa + Kale Patties

I’m going to keep this one short and sweet because we’re all too busy with December to actually sit down and read anything of length right now. If it’s not after work drinks, some kind of Christmas themed event, dinner with friends or present buying then it’s decorating the tree, putting up Christmas lights and perfecting your mince pie recipe. If, and only if you have a spare moment, then it will certainly be to have a big glass of wine and watch shit tv. So, as I said… short n sweet.

I originally saw this wondrous recipe on Green Kitchen Stories (i.e. my happy place on the internet, after Pinterest) and immediately wanted to recreate them in my own kitchen. I tweaked the recipe a fair amount, depending on what I had in my cupboards, and subbed out the cheese altogether in favour of a dairy-free option.

The resulting quinoa patties are delicious little additions to add to any base for lunch or dinner; I enjoyed them with a simple cabbage salad one day and hummus and carrot sticks the next. Plus if you have leftover quinoa to begin with then these can be made in a snap.

Happy December!


QUINOA + KALE PATTIES

Makes 8 patties

Ingredients

200g quinoa

500ml water

Pinch of salt

2 large handfuls of kale, stems discarded

2 eggs

100g silken tofu

1 teaspoon dried chilli flakes

1 tablespoon dried oregano

Olive oil for frying


Method

  1. Star by cooking the quinoa; rinse 200g under cold water then add to a saucepan with 500ml of water and a pinch of salt. Bring to the boil, then reduce to a simmer and cook for around 20 minutes. Remove from heat and set aside to cool.
  2. Once cool add the quinoa, kale leaves, eggs and tofu to a large bowl and mix well with your hands. Season generously and add the dried chilli and oregano. Pat down the mixture in the bowl and transfer to the fridge to set, around 30 minutes.
  3. Shape the quinoa into 8 patties using your hands. Heat a few glugs of olive oil in a large pan and cook the patties in batches, around 4-5 minutes on each side or until golden and crisp.
  4. Serve warm with a simple salad or perhaps a poached egg.

Notes -

By all means substitute the tofu for feta if you aren’t avoiding dairy. If you are following a vegan diet you could try using 200g silken tofu in place of the eggs as a binding agent.

Ricotta, Asparagus + Parma Ham Crostini

A couple of weekends ago I was in Impruneta in provincial Florence. It was like everything you’d expect from a small Tuscan town; winding countryside roads, rolling hills, incredible regional produce and beautiful views in every direction. It was breathtakingly beautiful and I seriously considered moving there approximately 4 times in a 36 hour period.

Ricotta, Asparagus + Parma Ham Costini | Thyme & Honey

I was there for a wedding. A proper Italian, Tuscan wedding – or matrimonio toscano, if you will. Not that I’m massively into it but you know, basically the dream.

The ceremony was short and tasteful. The views were undeniably beautiful. The company was unbeatable, and the food? Incredible. I’m talking salty cured meats, the freshest tomatoes, the most creamy and delicious burrata I have ever encountered, zucchini flowers, pork cheek, fresh pasta – the list goes on. I left beaming and well-fed, and perhaps a little tipsy. Ya know.

After I got back to London it got me thinking about my favourite appetisers and entertaining dishes and it occurred to me there was something that could be in the running for the ultimate ‘occasion’ nibble: crostini.

Crostini consist of toasted slices of ciabatta, drizzled with great quality olive oil and topped with pretty much whatever you fancy. Keeping true to its Italian origin you could go for a simple mushroom or tomato and basil topping, but I love to get more creative with flavours and textures.

Longing for the burrata I ate in Impruneta and not having it to hand I topped toasted fresh ciabatta with ricotta, before laying to bed wafer thin slices of Parma ham and shaved asparagus on top, finishing with a simple leaf or two of fresh basil. Uh-oh kinda heaven.

Crostini certainly get my vote. What are your go-to dinner party dishes?

Happy Friday (and 4th July for all y’all American readers)!

A Tuscan Wedding | Thyme & Honey

Ricotta, Asparagus + Parma Ham Crostini

Makes 8 crostini

Ingredients

1 loaf of ciabatta, cut into inch thick slices

Olive oil

1 garlic clove

4-5 slices of Parma ham

4 small or 2 large asparagus

250g ricotta cheese

Fresh basil


Method

  1. Toast the ciabatta slices. Rub the garlic clove over one side of each crostino slice.
  2. Season the ricotta with a little salt and pepper and dollop onto each crostino. Next top with a sliver of Parma ham.
  3. Cut the asparagus into ribbons using a vegetable peeler and blanche in boiled water for around 1 minute. Drain and cover with cold water to prevent losing the vibrant green colour.
  4. Top the Parma ham with the asparagus ribbons, followed by a few basil leaves and a healthy drizzle of olive oil.
Hummus

Hummus is something I can’t remember trying for the first time because I’ve never known life without it, and I don’t think there will ever be a day where I’d turn down a dip into its creamy chickpea waters. Aside from one brand available in supermarkets, the tubbed variety is really just… not hummus. Real hummus, in all its homemade glory, is fresh and nutty, spiked with lemon and a touch of garlic and should be somewhat airy and delectably smooth. Best served at room temperature, drizzled in good quality olive oil and a dash of sumac. Sharing with friends, optional.


Hummus

Makes 500g

Recipe adapted from Ottolenghi/Samimi’s Basic Hummus recipe in their gorgeous cookbook, Jerusalem


Ingredients

250g dry chickpeas (equates to roughly 500g when cooked and skins removed)

1 teaspoon bicarbonate of soda

1.5 litres water

3 garlic cloves

170g light tahini

Juice of 1 lemon

1 1/2 teaspoons salt

Sumac, olive oil, toasted pine nuts* (to serve)


Method

  1. Soak the dry chickpeas overnight in double the amount of water.

  2. The next day drain the chickpeas and cook in a saucepan on a high heat with the bicarbonate of soda for a few minutes before adding the water. Cook for 30-40 minutes or until the chickpeas are tender.

  3. Once cooled enough to handle, pop the chickpeas out of the skins using your thumbs, index and middle finger. It’s therapeutic, trust me.

  4. Add the chickpeas to a food processor with the garlic and salt and pulse until crumb-like. Add the lemon juice and tahini and blitz until smooth. Next, keep the blender running and pour in about 100-120ml of cold water and blend for a few minutes until you have what is pretty much the most delicious hummus around. Leave to rest for 20-30 minutes before serving, otherwise keep refrigerated until needed.

  5. To serve, spread lovingly on a plate, adorn with a drizzle of olive oil, a dusting of sumac and a few toasted pine nuts.

  6. Serve at room temperature.

*Spread the pine nuts on a baking sheet and blast at full temp for 3-5 minutes.