Posts tagged food
Roasted miso salmon with brown rice + scallions

So... hi. It's been over two years (!!) since my last post, possibly the longest hiatus from a blog the world has ever known.  

Roasted miso salmon with brown rice and scallions

Truth be told, a lot has happened. When my mum was diagnosed with terminal cancer in May 2016 everything changed, and by November that year I left my job to look after her - simultaneously the easiest and most difficult decision I have ever made. In short, it was the most painful time of my life and everything took a backseat while I navigated through heartache and grief - including this blog. 

Fast forward to today - a little over a year since she passed away - and I feel like I'm slowly coming out of the fog and starting to pick things back up. A conversation with a friend asking me about whether or not I'd update this blog again prompted me to post this - something a little fun on a sunny, chilled out Sunday.  

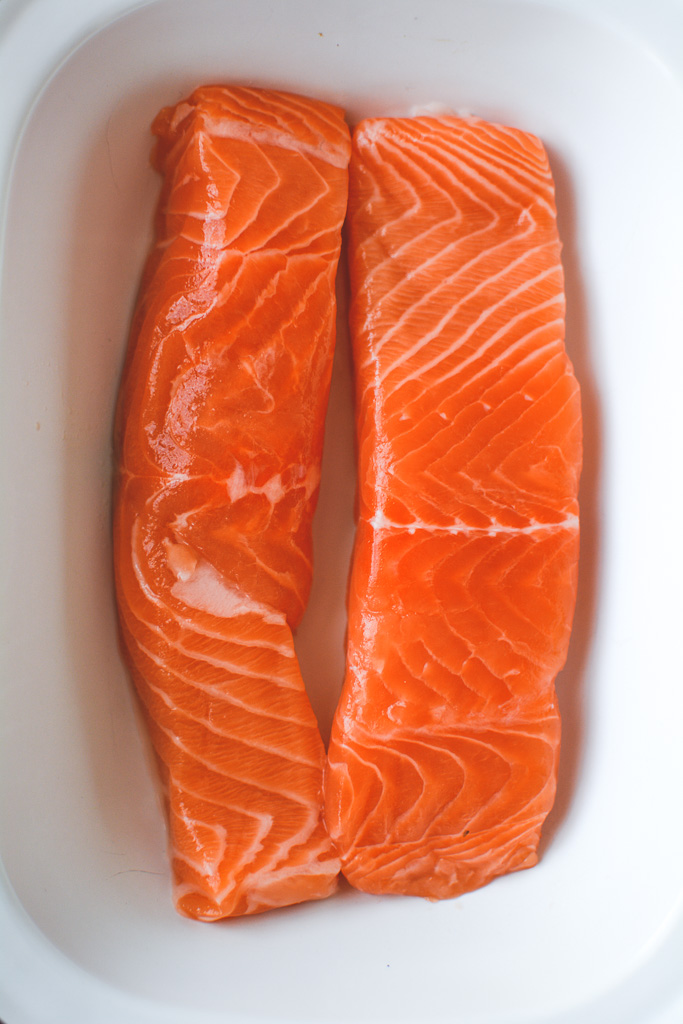
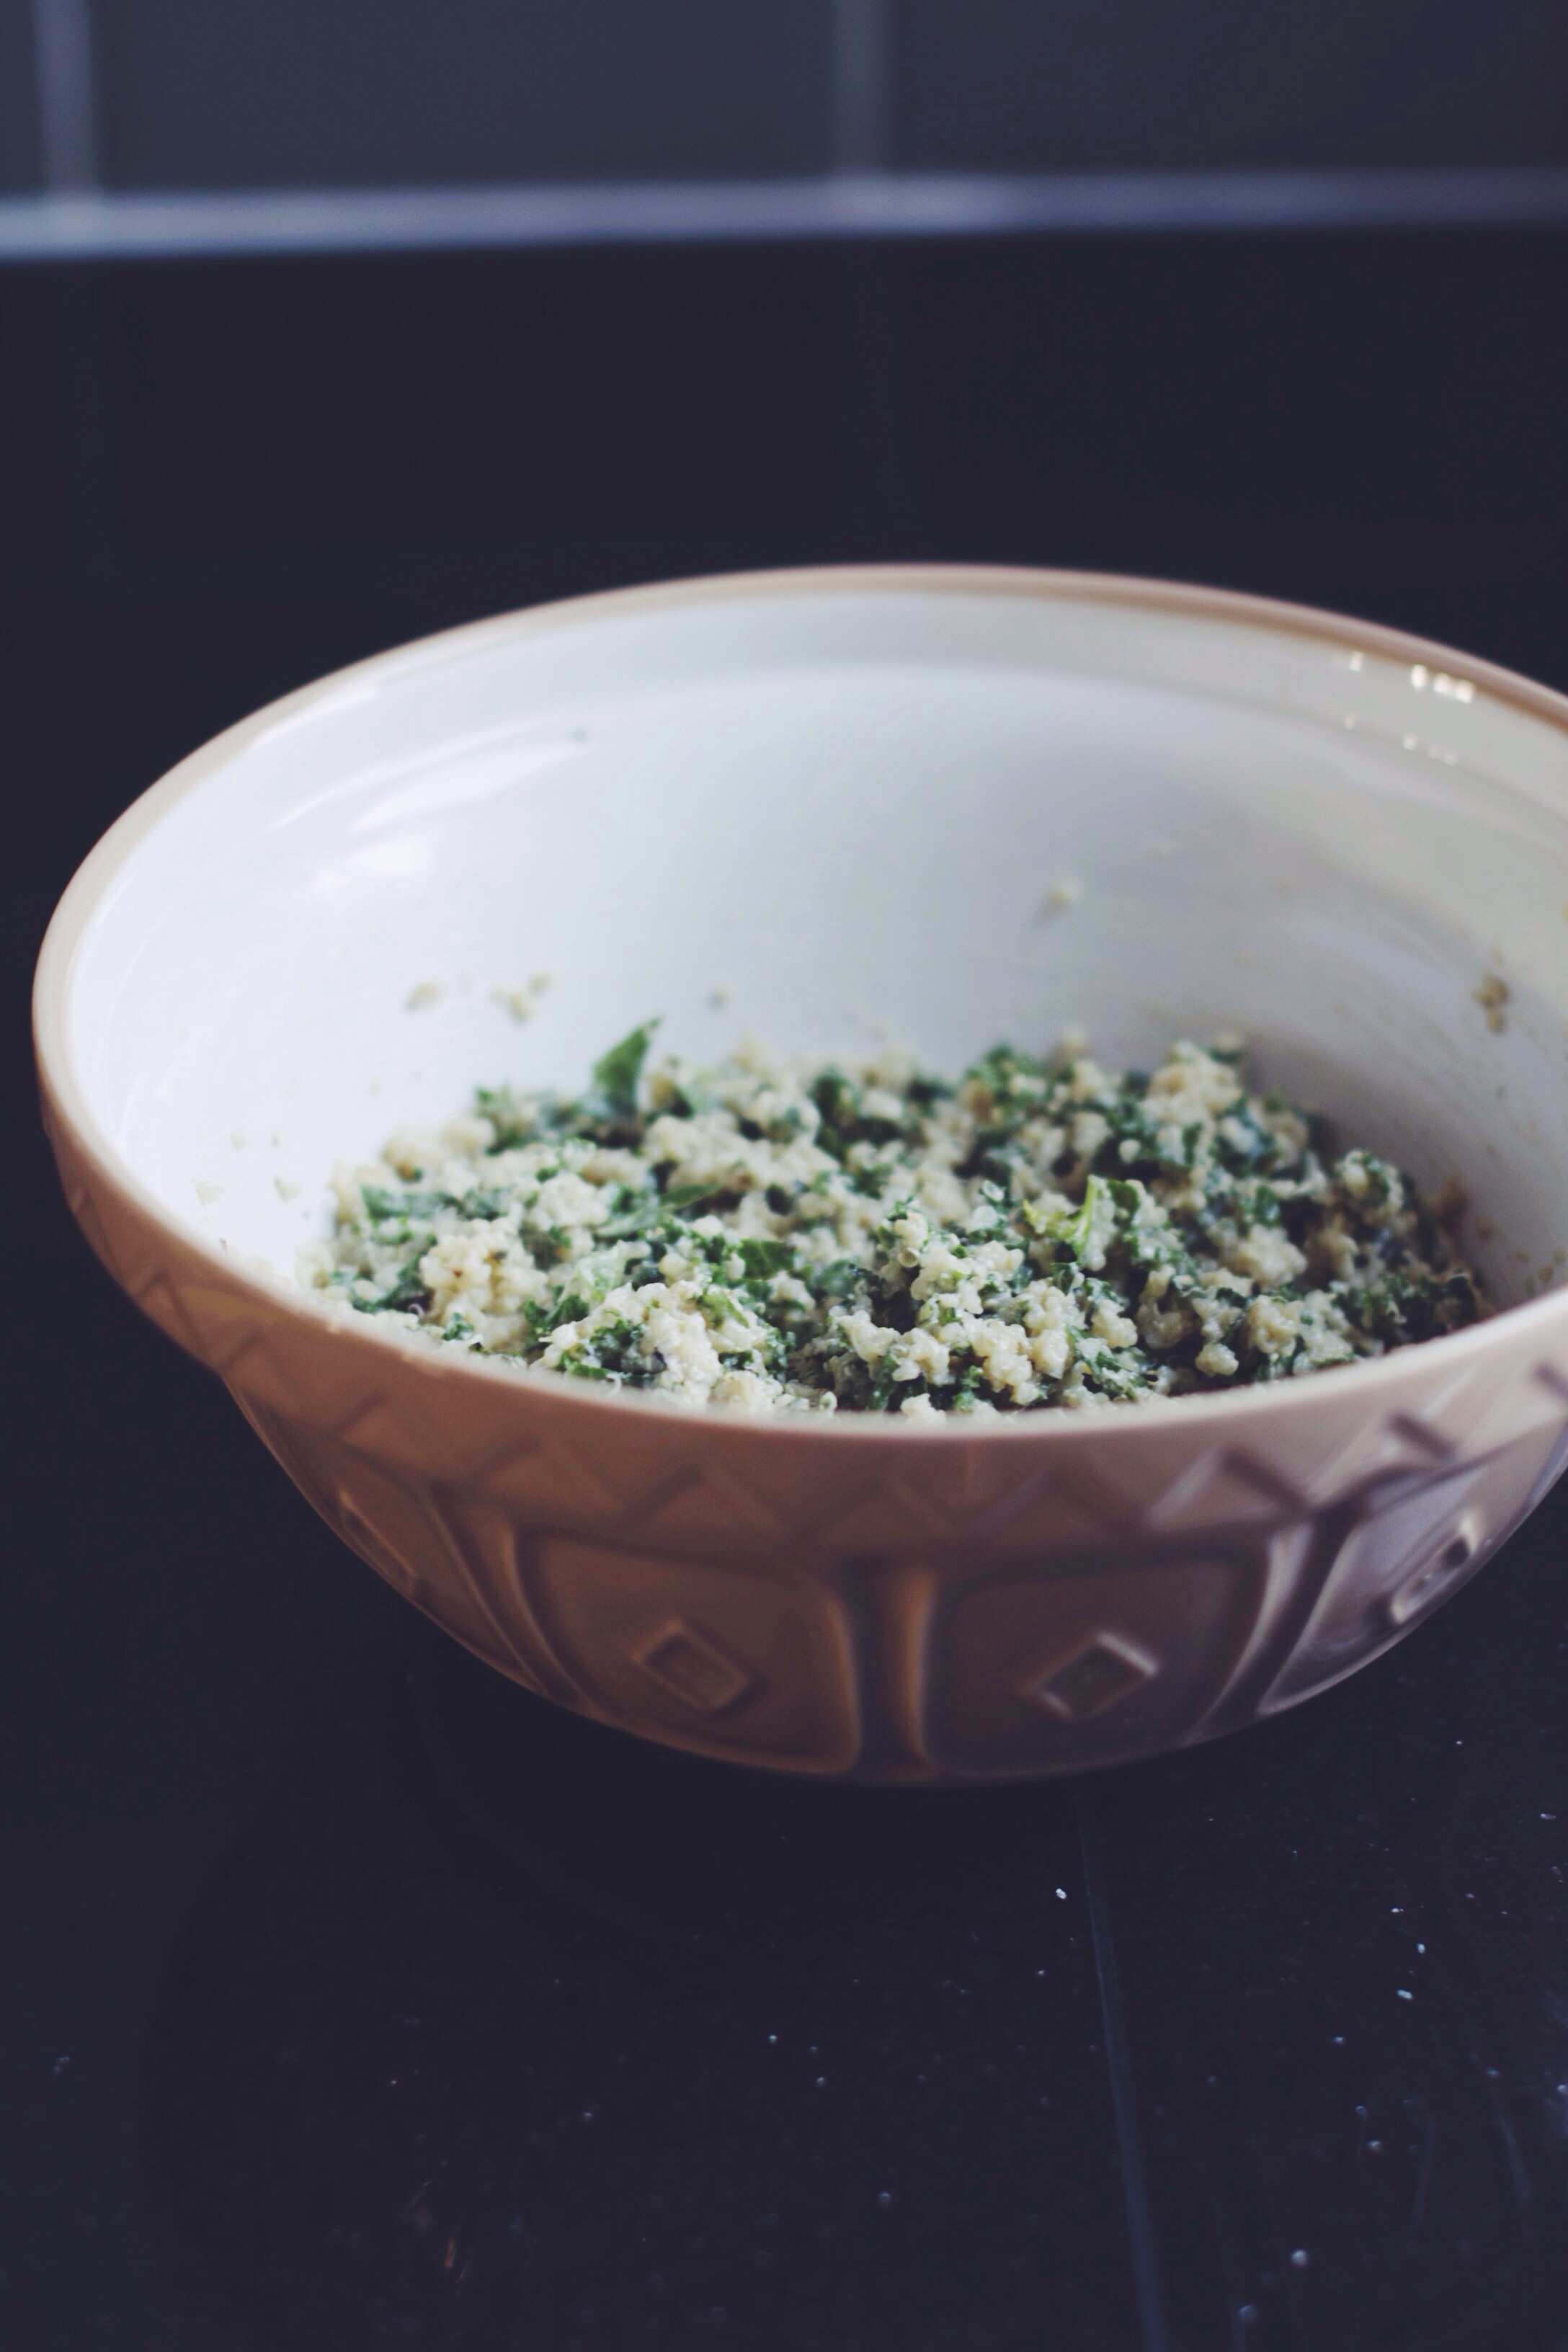
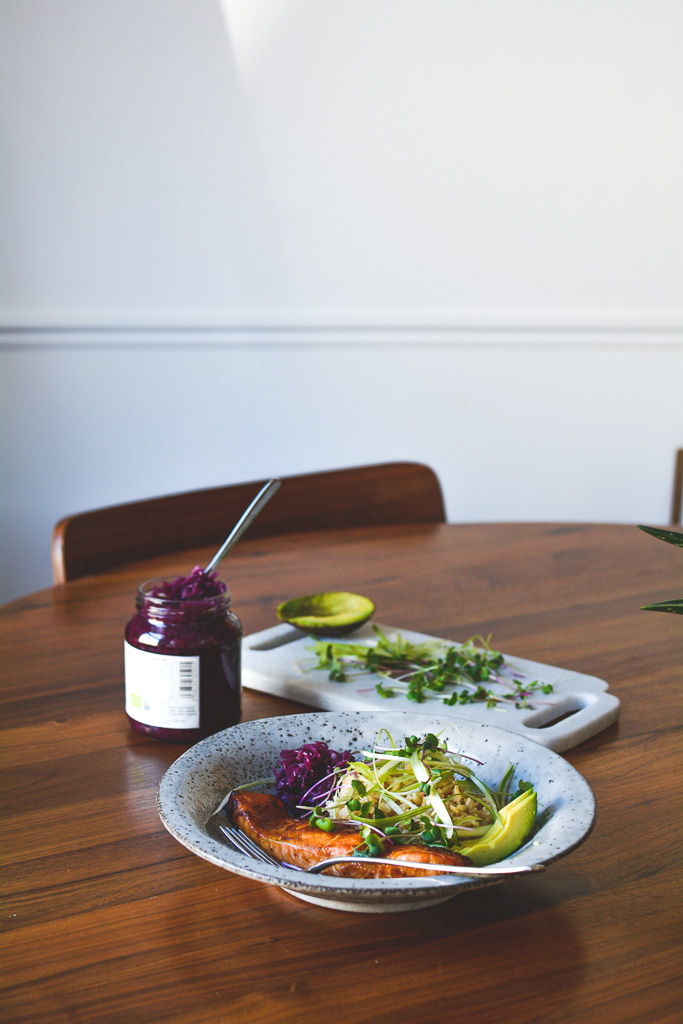
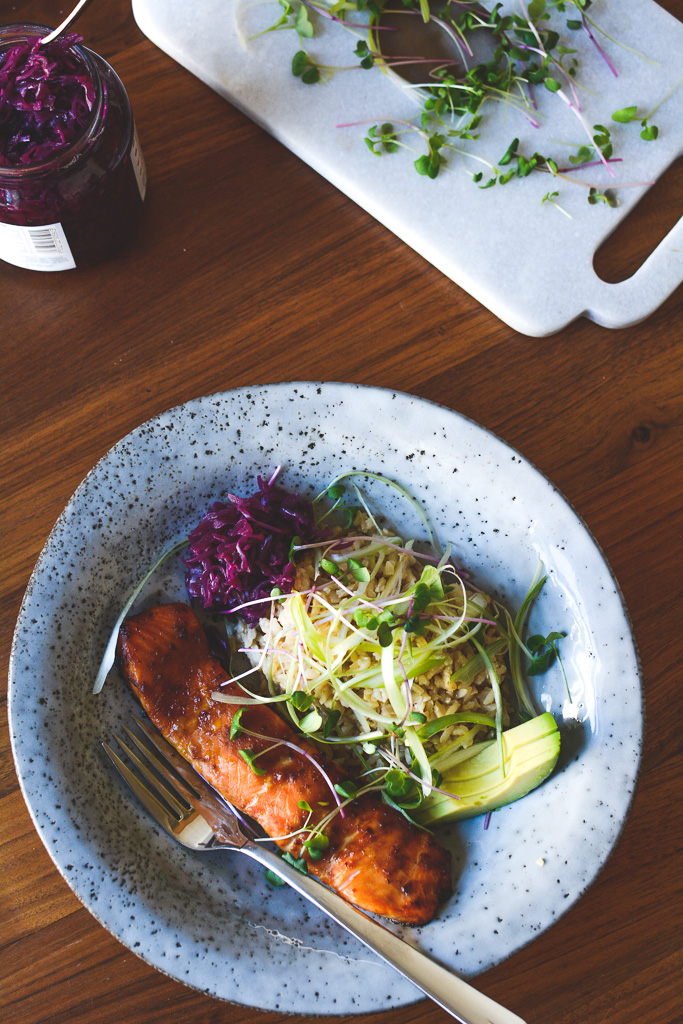
This is my dream food on a plate, a combination of all the good fats, protein, nutty brown rice and a mash up of flavours - plus it's pretty healthy too. I like to hit the salmon at a high temp for a short amount of time so it's just cooked through with a nice finish on the outside. Add as many or few components as you like - avo and a pop of pickled cabbage work a treat for me. 

Roasted miso salmon with brown rice and scallions

Roasted Miso Salmon with Brown Rice + Scallions

Serves 2

Ingredients

For the fish:

2 salmon fillets

1 tbsp brown rice miso paste

1 tbsp maple syrup

2 tbsp fresh orange juice

For the rice:

400g cooked brown rice 

2 tbsp light soy sauce

1 tbsp rice wine vinegar

1 tbsp toasted sesame oil 

Small handful slivered almonds, roughly chopped

1 tbsp sesame seeds

Garnish:

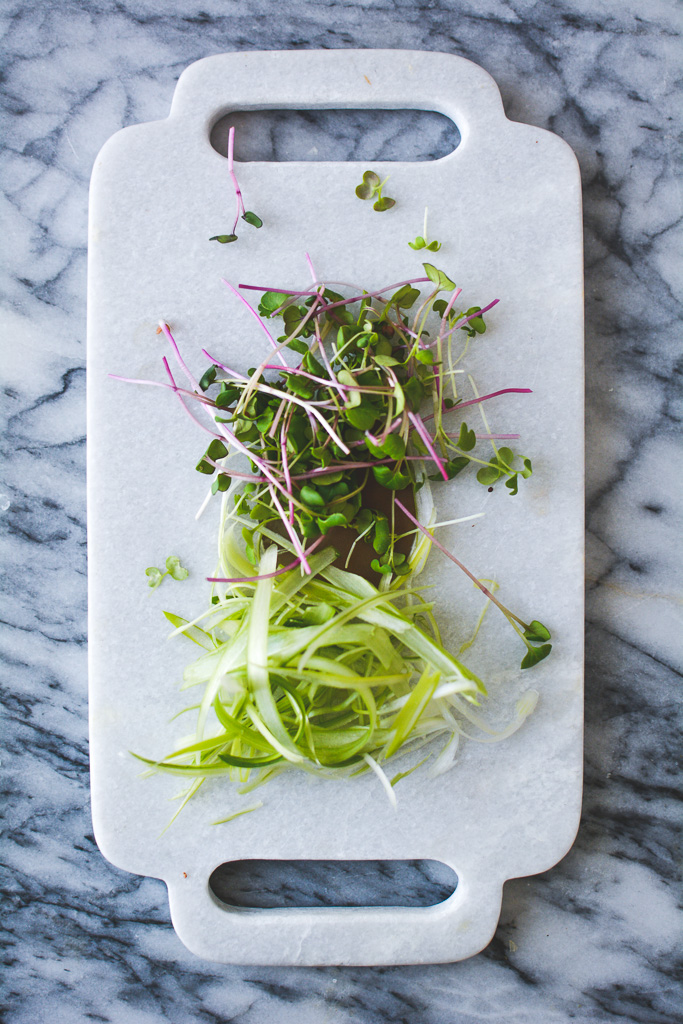
2-3 scallions, peeled

Micro greens

Avocado

Pickled red cabbage


Method

Preheat oven to 220c (200c FAN) 

  1. Mix together the miso paste, maple syrup and orange juice and pour over the salmon fillets - leave to marinate for as long as you can spare. 
  2. Transfer the fillets to a baking tray and cook in the centre of your oven for 15-16 minutes. 
  3. Meanwhile, toss the rice with soy sauce, rice wine vinegar, sesame oil, almonds and sesame seeds and season to taste with a little salt if required. 
  4. Plate the salmon alongside the rice, top with the peeled scallions, micro greens (if using), a side of avo and a heaped tablespoon of pickled cabbage. 
Dark Chocolate + Sea Salt Cookies

My quest for the perfect chocolate chip cookie began some time ago, you could say to the point of obsession. I've been playing around with recipes for a good couple of years, determined to find the holy trinity of cookie greatness; that crunchy Maryland style exterior, chewy Millie's Cookies vibe and a hint of shortbread madness, and up until now my attempts have been futile and full of failure - tasty failure - but still failure nonetheless. 

And then I found the one. I first tasted the best cookie in the world at Cafe Grumpy in Chelsea, NYC. I clocked that bad boy through the glass counter, skeptical of its vegan title given its clear good looks. Obviously I felt compelled to try it, keen to prove its mere existence wrong - surely it couldn't be good and vegan, I scoffed. I carefully removed it from the grease-marked brown paper it had been wrapped in and dove right in.

It was delicious. The first bite took me by surprise, 'but it's vegan!' my brain screamed at itself, sure that there had been some kind of error on the labelling. 'Those grumpy coffee aficionados must be messing with me', I concluded before inhaling the rest of the best cookie I had ever tried in about 0.3 seconds flat. 

When I got back to London I began trying to recreate the magic, and settled on using Ovenly's vegan choc chip cookie as a base. The first attempt was incredible, following their recipe pretty much to the T I found that I had a deliciously classic, chewy and slightly crunchy cookie - but it was missing that shortbread aspect I like so much. I wanted it to be crunchy, chewy and crumbly all at the same time. What can I say, I'm hard to please. 

I revisited the recipe, this time subbing canola for coconut oil and found that I had struck GOLD. The dough itself was more shaggy and crumbly, but came together nicely when I pressed it into mounds - like a shortcrust pastry would. When the cookies emerged from the oven, just crisp yet almost lava-like before cooling, I basically couldn't handle my life

But I still wasn't 100% happy. They didn't have that speckled chocolate flex that I'm all about, the choc chips instead gave off too much of a cookie next door all-American vibe, plus I wanted a more balanced salt flavour, rather than a heavy game on top. 

This is where Lindt's Dark Chocolate with Sea Salt came in. Not too much salt but not too little that the flavour fails to come across, I chopped a couple of bars into chunks and shards and threw them into the mix. The result? Speckled, salty, crunchy, chewy, ever so slightly crumbly - everything you could want in a cookie. 

Suck on that, Chips Ahoy.   

Dark Chocolate + Sea Salt Cookies | Thyme & Honey

Dark Chocolate + Sea Salt Cookies

Yields approx. 18

Recipe adapted from Ovenly's heavenly Vegan Choc Chip Cookies

Ingredients

240g all-purpose flour

1 + 1/4 teaspoon bicarbonate of soda

1/2 teaspoon salt

200g Lindt Dark Chocolate with a Touch of Sea Salt

80g caster sugar

70g soft light brown sugar 

100g coconut oil

60ml water

Coarse sea salt flakes like Maldon for garnish


Method

  1. In a large bowl whisk together the flour, bicarbonate of soda and salt. Chop up the chocolate into small chunks and shards and stir into the flour mixture. 
  2. In another bowl combine the two sugars, breaking up any clumps with your hands or the back of a spoon. 
  3. Heat the coconut oil until melted, then add to the sugar along with the water - whisk until smooth. 
  4. Add the sugar mixture to the flour and stir to combine with a wooden spoon until no flour is visible and the dough just comes together - it should be quite shaggy, don't worry about this. 
  5. Cover the bowl with cling film and refrigerate for 12-24 hours - DON'T SKIP THIS STEP!
  6. After the dough has rested in the fridge, preheat the oven to 180°c (165°c FAN).
  7. Using your hands roll the dough into 2 inch balls (you should be able to make about 18) and place them on a baking sheet lined with parchment paper. 
  8. Use a spoon to gently press down the balls slightly, and sprinkle the a pinch of sea salt flakes. 
  9. Bake for 13-15 minutes until the edges are just golden. 
  10. Leave to cool completely before serving. 
Curried Carrot + Chickpea Salad

Episodic memories are those that form feeling toward a particular time or place. Personally I find these memories awaken when the seasons begin to shift from spring to summer, and a plethora of imagery comes bounding into view, leading to a babble of memories of idyllic nostalgia; the smell of Nivea suncream, the sound of the sea lapping methodically on the shore, slithers of blinding sunlight creeping through thick pine in the Troodos mountains - you get the picture. Ultimately these lucid dreams of summer result in me spending hours Google searching 'best beach holidays in Europe 20-whatever it is' and vowing to steer clear of ice cream in preparation for the big reveal come beach day. 

Curried Carrot + Chickpea Salad | Thyme & Honey

And so is life, 6 weeks prior to my departure for 10 days of unadulterated bliss, sea, sun, mountains, food and family I begin this torturous countdown that involves many a salad, and not so many an ice cream. My better self tells me it will be worth it, my lazy, sugar-loving self hisses at the former with pure hatred. 

I proceed with varying levels of sadness, denial and hesitation, but occasionally I find moments of victory is salads like this. Largely raw, eye pleasingly colourful and packed with protein, fiber, zinc, vitamins A & C, antioxidants and more wonderfully restorative and essential nutrients, this was quickly added to my arsenal of 'eat clean' recipes.

Using Madras curry powder in the dressing adds a unique smoky undertone, while the lemon juice keeps it fresh and zingy. If I wasn't avoiding dairy I'd have added a dollop of plain Greek-style yoghurt, or a few crumbly bites of feta. Oh, to dream (about everything I will inhale once I'm actually on holiday). 

Curried Carrot + Chickpea Salad | Thyme & Honey

Curried Carrot + Chickpea Salad

Serves 4, or 2 as a main

Ingredients

1 large carrot

240g cooked chickpeas

10 small asparagus spears

Handful of radishes, around 5 or 6, thinly sliced

2 tablespoons capers

30ml olive oil

1 teaspoon Madras curry powder

1/4 teaspoon ground cinnamon

Juice of half a lemon

Mixed salad greens - I used a mix of fennel tops and sweet leaves


Method

  1. Using a julienne peeler, slice the carrot into thin strips. If you don't have one of those peelers you can use a mandoline to slice the carrot into ribbons, and then cut the strips by hand. You can also use the mandoline to slice the radishes. 
  2. Remove the spears from the asparagus stalks and set aside. Use a vegetable peeler to create shavings from the stalks. 
  3. Place the chickpeas, carrots, asparagus shavings and radishes in a bowl and set aside whilst you make the dressing. 
  4. Combine the olive oil, curry powder, cinnamon, lemon juice and a good amount of seasoning, whisking well to combine. Pour the dressing over the vegetables and toss well until evenly distributed. 
  5. Blanche the asparagus tips in boiling water - submerge them for a couple of minutes before rinsing under cold water.
  6. Serve the dressed salad on a bed of leafy greens and scatter over the capers and asparagus tips before adding a final drizzle of olive oil. 


Blood Orange Marmalade

Today is one of those days where I find myself just looking forward to the next. Maybe it's because today is probably one of the most miserable days this year, and fittingly I've spent the majority of it either caught in the rain, or staring at it from within the warmth of my flat. Or maybe it's the fact that I'm still mourning the end of blood orange season that's putting me in a particularly bad mood. All I know for sure is that I'm finding a little slice of happiness in the memory of this sweet, citrus marmalade.

Blood Orange Marmalade | Thyme & Honey

Preserving fruit when it's in its prime is the best way to guarantee enjoying it when it's out of season, and I find citrus works particularly well in that respect. Blood oranges have a more intense flavour than their plain Jane cousins, and make for a pretty lip smacking marmalade. All you need to do is add a touch of lemon, a hefty amount of sugar and prepare not to burn yourself on hot jars after canning like I did. 

Just a note on the consistency here; I like to keep this marmalade quite chunky as I love that extra burst of flavour it gives, however you can get yours more jam-like if you cut the oranges up into smaller chunks. 

Blood Orange Marmalade | Thyme & Honey

*when blood oranges are out of season, you can substitute for regular oranges for an equally delicious marmalade.

Blood Orange Marmalade

Makes 2 small jars (roughly 340g)

Ingredients

8 medium-sized blood oranges

2 tablespoons fresh lemon juice

500g caster sugar


Method

  1. Remove the peel from the oranges, being careful to also remove any white pith. Using a sharp knife cut the peel into very thin slices and set aside. 
  2. Remove any membranes from the orange segments and cut into rough pieces. Place the oranges pieces, lemon juice and sugar into a heavy-bottom pan. 
  3. Bring to a boil over a medium heat, stirring often. Then reduce to a simmer and continue to cook for 45 minutes -1 hour until a candy thermometer reads 225°F. 
  4. Meanwhile, place around 2 tablespoons of the sliced peel (you can discard the rest or add more if you like) in a saucepan, cover with cold water and bring to boil over a medium heat. Reduce to a simmer and cook for around 5 minutes, then drain and set aside ready to stir into the marmalade in the last few minutes of cooking. 
  5. Spoon the marmalade into sterilised jam jars fitted with sterile lids. 
  6. Place the jars in a deep, heavy-bottom pan filled with boiling water. Keep the jars in the water bath on a medium heat for 10 minutes, or according to canning-pot instructions. 
  7. Carefully remove the jars from the water bath and place on kitchen towel - make sure the jars don't touch one another and have enough space. 
  8. Once cool you can store the marmalade in a cool, dark place for up to a year, but you'll need to refrigerate once opened. 


Chive + Basil Pesto

Everyone has that one recipe that they go back to time and time again, and for me it's pesto. Perhaps it's the ease in throwing it together, or the fact that its traditional use is with my favourite carb, but there is something about its herby, garlicky notes that keep it firmly on my go-to recipe list. 

What I love about pesto is its versatility. Every green herb or leaf that I throw at it seems to work in its own right, with unfamiliar flavour profiles lending themselves to different parts of the palate, adding an element of discovery each time I try a new combination. This particular pesto is made using chives as well as basil, resulting in luxuriously garlicky undertones while keeping it classic. Use it on pasta like I've done here, or dot it onto ricotta on toast - it is all good.  


CHIVE + BASIL PESTO

Makes 200g 

Ingredients

30g fresh chives

20g fresh basil leaves, stalks discarded

3 tablespoons pine nuts

1 garlic clove, minced

6 tablespoons mild/light olive oil

30g parmigiano reggiano, finely grated


Method

  1. In a food processor, add the herbs, pine nuts, garlic, olive oil and a good pinch of salt and pepper and blend.

  2. Scrape the pesto mixture into a bowl and by hand stir in the grated parmesan. Add an extra glug of olive oil for good measure.  

  3. Cook your pasta of choice until al dente (allow 150g per person), reserving a little of the cooking water before draining. Add 1 heaped tablespoon of pesto per person, along with a splash of the reserved water.

  4. Serve immediately. 

Homemade Goat's Ricotta

Recently I've been trying my hand at making as much as I can from scratch. From nut milks and butters to jams, bread and pasta, I've been searching for ways to make the food that I cook more clean, economical and most importantly resulting in less wastage.  

Of course there is the added wow factor of a meal made in its entirety by your own hands, a certain smugness when telling those eating it how you spent time peeling the tomatoes that would come to be in the most delicious sauce, or kneading the dough that would eventually be the toast on their plate. Yes, a little bit of smugness might irritate even the politest of guests (read: live-in boyfriend), but you know - modesty is a virtue, right? 

When it comes to cheese, ricotta is up there with halloumi (forever my undisputed favourite) and in my house it's spread on toast, stuffed into pasta shells or simply eaten with a spoon. Yes, I am one of those girls that eats cheese with a spoon. I HAVE NO SHAME. 

Luckily, when it comes to cheese, ricotta is probably the easiest to make at home. All it takes is three ingredients, a thermometer and a muslin cloth and pow, you've got the good stuff. How does it work I hear you say? Heat milk until scalding, pour in your acidity (white wine vinegar, lemon etc), add a pinch of salt and then leave it be before straining and slathering onto sourdough toast topped with radish slices and freshly cracked pepper. Or whatever else you fancy. 

This recipe uses goat's milk in place of regular cow's for a mild goat-y finish, and a consistency closer to a somewhat crumbly chèvre. Just like regular ricotta but with a bad ass attitude. 


Homemade Goat's Ricotta

Makes 500g

Ingredients

2 litres goat's milk

80ml white wine vinegar

1 teaspoon salt


Method

1. Add the goat's milk to a saucepan and heat on medium until it reaches 200°F.

2. Remove from the heat and stir in the white wine vinegar and the salt.

3. Leave undisturbed for 10 minutes in order for the curd to separate from the whey.

4. At this point, scoop the big curds using a slotted spoon and place in a fine mesh strainer lined with a cheese cloth. Then pour in the remaining whey and smaller bits of curd.

5. Leave to strain for 10-60 minutes depending on the desired consistency. I like mine relatively crumbly so I left it for around 20 minutes. If you strain the ricotta for longer than you'd like simply add a little of the whey back to the curds to make your ricotta more creamy.

Store refrigerated in an airtight container for up to one week. 

Vegan Fennel, Radish + Broccoli Slaw

It started out of sheer laziness, adding raw vegetables to salads instead of bothering to cook them. With a single swipe along my mandolin I had slithers of cauliflower, fennel or broccoli that would have otherwise been cooked first had this new option not been so convenient. With the right kind of dressing I found that I could make a sort of vegetable ceviche, the edge taken off that typically unappetising ‘rawness’, the flavour mellowing through marinating in my lunch box on my desk at work.

I’ve been testing various slaw recipes periodically, sometimes opting for an Asian combination of flavours, other times a luxuriously creamy American style, but this really is the recipe that I keep coming back to. The dressing here unlike in other slaw recipes is certainly not the show-stealer, but its subtle nutty flavour thanks to tahini is a welcome note on the palate. Throw this together quickly and leave for a while for the flavours to really gel. I eat this for lunch on its own, or with half an avocado for good measure. Adding a slice of rye bread into the equation is always a welcome addition, too.

If you’ve been reading my posts for a while you would have heard me discuss a new found love of plant-based eating, and although I cannot confirm that I have been exercising this new diet religiously and without steak/eggs, I can confirm that for the most part I am still enjoying creating dairy-free/meat-free dishes – on occasion. This slaw just so happens to work extremely well with either a dairy alternative to yoghurt, or the real deal. So, do with it what you will.


VEGAN FENNEL, RADISH + BROCCOLI SLAW

Serves 4

Ingredients

1 medium head of broccoli

1 large fennel

6-8 radishes

100g cavolo nero, stalks removed and leaves shredded

8 stalks of fresh dill

For the dressing:

60ml olive oil

30ml tahini paste

50ml soya, coconut or regular yoghurt

2tsp rice mirin or vinegar

Juice of 1 lemon


Method

  1. Using a mandolin if you have one will make putting this salad together a total breeze. If you don’t have one, then try and slice the fennel and radishes as finely as possible.
  2. Slice the fennel, radishes and broccoli using a mandolin and place in a large bowl. Add the shredded cavolo nero and tear in the fresh dill leaves.
  3. For the dressing add all of the ingredients to a jam jar and shake well until thoroughly mixed and creamy in consistency.
  4. Pour the dressing over the salad, toss well to coat. Season to taste with salt flakes and freshly ground black pepper.
  5. Serve on its own or in rye (or however you like) with extra fresh dill and a drizzle of extra olive oil.
Quinoa + Kale Patties

I’m going to keep this one short and sweet because we’re all too busy with December to actually sit down and read anything of length right now. If it’s not after work drinks, some kind of Christmas themed event, dinner with friends or present buying then it’s decorating the tree, putting up Christmas lights and perfecting your mince pie recipe. If, and only if you have a spare moment, then it will certainly be to have a big glass of wine and watch shit tv. So, as I said… short n sweet.

I originally saw this wondrous recipe on Green Kitchen Stories (i.e. my happy place on the internet, after Pinterest) and immediately wanted to recreate them in my own kitchen. I tweaked the recipe a fair amount, depending on what I had in my cupboards, and subbed out the cheese altogether in favour of a dairy-free option.

The resulting quinoa patties are delicious little additions to add to any base for lunch or dinner; I enjoyed them with a simple cabbage salad one day and hummus and carrot sticks the next. Plus if you have leftover quinoa to begin with then these can be made in a snap.

Happy December!


QUINOA + KALE PATTIES

Makes 8 patties

Ingredients

200g quinoa

500ml water

Pinch of salt

2 large handfuls of kale, stems discarded

2 eggs

100g silken tofu

1 teaspoon dried chilli flakes

1 tablespoon dried oregano

Olive oil for frying


Method

  1. Star by cooking the quinoa; rinse 200g under cold water then add to a saucepan with 500ml of water and a pinch of salt. Bring to the boil, then reduce to a simmer and cook for around 20 minutes. Remove from heat and set aside to cool.
  2. Once cool add the quinoa, kale leaves, eggs and tofu to a large bowl and mix well with your hands. Season generously and add the dried chilli and oregano. Pat down the mixture in the bowl and transfer to the fridge to set, around 30 minutes.
  3. Shape the quinoa into 8 patties using your hands. Heat a few glugs of olive oil in a large pan and cook the patties in batches, around 4-5 minutes on each side or until golden and crisp.
  4. Serve warm with a simple salad or perhaps a poached egg.

Notes -

By all means substitute the tofu for feta if you aren’t avoiding dairy. If you are following a vegan diet you could try using 200g silken tofu in place of the eggs as a binding agent.

Dark Chocolate Covered Caramels

It’s officially that time of year again; the lights are up, the ads are out, the nights are getting boozier… it’s Christmas whether you like it or not.

Dark Chocolate Covered Caramels | Thyme & Honey

Sure, some might say it’s a bit early to get the Christmas paraphernalia out, but I for one am all over it – give me a gingerbread latte with a shot of whisky and I’ll be marvellously content cozied up in my Slanket* with Home Alone 2 on repeat.

(Also, December: the only month where you can get fat gracefully.)

You may remember last year I posted a similar recipe and moaned about how broke I tend to be at this time of year (I absolutely needed three of those cashmere jumpers, didn’t I), so it’s fair to say I get a little resourceful with my gift giving. Enter these beauties, chocolate covered and deliciously decadent. These really aren’t as daunting as they may seem, it’s more a case of patience and trying not to burn yourself, the caramel, or your pan.

So there you have it, I’ll leave you with this bomb recipe to add to your budget Christmas 101 repertoire – plus a pretty great soundtrack to go with it (courtesy of Cereal Magazine)

*the best gift ever received, not giving it up never ever ever

Dark Chocolate Covered Caramels | Thyme & Honey

Dark Chocolate Covered Caramels

Makes 60 caramels

Ingredients

150g soft light brown sugar

125g golden syrup

100g unsalted butter, cut into cubes

250ml thick double cream

150g caster sugar

200g dark chocolate

Decorative sugar pieces (if using)


Method

You’ll need a candy thermometer for this recipe.

  1. Firstly prepare a tin for your caramel to set in by lining it with parchment paper.
  2. In a pan add the brown sugar, golden syrup, butter and cream and place over a low heat. Heat the mixture until smooth and hot, stirring occasionally. Remove the pan from the heat and set aside.
  3. In a heavy duty pan add the caster sugar and 3 tablespoons of water, and start to dissolve over a low heat. Once dissolved you can bring the heat up a little, keep melting the sugar syrup until it caramelises and turns amber in colour. NOTE: You don’t want to stir the syrup unless there are specific spots where the sugar isn’t melting, rather whirl the pan.
  4. Once the sugar syrup has caramelised and turned a gorgeous dark amber colour, remove the pan from the heat and pour in the cream mixture, while exercising caution – this stuff is H O T.
  5. Put the pan back on the heat and pop your candy thermometer in. Bring the mixture up to 260°f and then immediately remove from the heat and pour into your prepared tin (if you fancy it you can sprinkle all or half with salt flakes).
  6. Leave (out of the fridge) for at least 5 hours or overnight before cutting into small squares.
  7. To chocolate coat the caramels, melt the dark chocolate in a glass bowl set above a pan of simmering water. Once melted, use a fork to dip a caramel square into the chocolate, then lift it out and let the excess chocolate drip off. Place the square on parchment paper to set, and decorate with sugar pieces if using. Continue with the rest of the caramels.

These will keep for a good 2 weeks stored in an air-tight container.

Ricotta, Asparagus + Parma Ham Crostini

A couple of weekends ago I was in Impruneta in provincial Florence. It was like everything you’d expect from a small Tuscan town; winding countryside roads, rolling hills, incredible regional produce and beautiful views in every direction. It was breathtakingly beautiful and I seriously considered moving there approximately 4 times in a 36 hour period.

Ricotta, Asparagus + Parma Ham Costini | Thyme & Honey

I was there for a wedding. A proper Italian, Tuscan wedding – or matrimonio toscano, if you will. Not that I’m massively into it but you know, basically the dream.

The ceremony was short and tasteful. The views were undeniably beautiful. The company was unbeatable, and the food? Incredible. I’m talking salty cured meats, the freshest tomatoes, the most creamy and delicious burrata I have ever encountered, zucchini flowers, pork cheek, fresh pasta – the list goes on. I left beaming and well-fed, and perhaps a little tipsy. Ya know.

After I got back to London it got me thinking about my favourite appetisers and entertaining dishes and it occurred to me there was something that could be in the running for the ultimate ‘occasion’ nibble: crostini.

Crostini consist of toasted slices of ciabatta, drizzled with great quality olive oil and topped with pretty much whatever you fancy. Keeping true to its Italian origin you could go for a simple mushroom or tomato and basil topping, but I love to get more creative with flavours and textures.

Longing for the burrata I ate in Impruneta and not having it to hand I topped toasted fresh ciabatta with ricotta, before laying to bed wafer thin slices of Parma ham and shaved asparagus on top, finishing with a simple leaf or two of fresh basil. Uh-oh kinda heaven.

Crostini certainly get my vote. What are your go-to dinner party dishes?

Happy Friday (and 4th July for all y’all American readers)!

A Tuscan Wedding | Thyme & Honey

Ricotta, Asparagus + Parma Ham Crostini

Makes 8 crostini

Ingredients

1 loaf of ciabatta, cut into inch thick slices

Olive oil

1 garlic clove

4-5 slices of Parma ham

4 small or 2 large asparagus

250g ricotta cheese

Fresh basil


Method

  1. Toast the ciabatta slices. Rub the garlic clove over one side of each crostino slice.
  2. Season the ricotta with a little salt and pepper and dollop onto each crostino. Next top with a sliver of Parma ham.
  3. Cut the asparagus into ribbons using a vegetable peeler and blanche in boiled water for around 1 minute. Drain and cover with cold water to prevent losing the vibrant green colour.
  4. Top the Parma ham with the asparagus ribbons, followed by a few basil leaves and a healthy drizzle of olive oil.